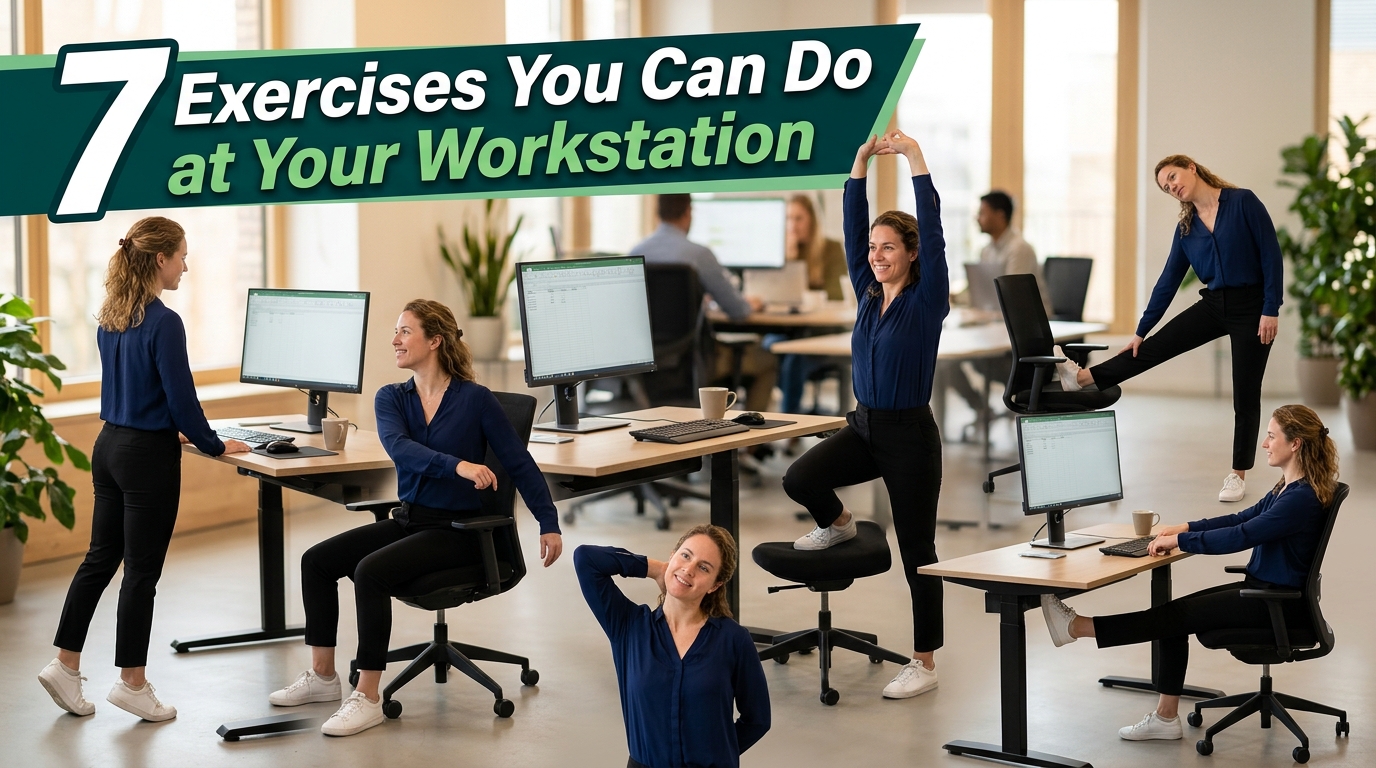
Desk Job Health Problems: 7 Exercises You Can Do at Your Workstation
Combat desk job health issues with these 7 simple workstation exercises. Reduce back pain, improve posture, and boost energy without leaving your desk in 2026.
It’s 3 PM on a Tuesday. You’ve been at your desk since 9 AM, and your lower back is screaming, your neck feels like concrete, and your wrists are tingling. Sound familiar?
Welcome to the reality of modern work life.
Here’s a sobering statistic: The average office worker now spends 10-12 hours sitting daily – at work, commuting, eating, and relaxing at home. That’s more time than we spend sleeping. And our bodies are paying the price.
I learned this the hard way. Three years ago, at age 29, I was diagnosed with early-stage disc degeneration in my lower back. My doctor’s first question wasn’t about injury or genetics – it was “Do you sit at a desk all day?”
The answer was yes. And I’d been doing it for seven years without thinking twice about it.
But here’s the good news: You don’t need a gym membership, fancy equipment, or even to leave your desk to counteract the damage. Small, strategic movements throughout your workday can make a massive difference.
This article will show you seven exercises you can do right at your workstation – proven to reduce pain, improve posture, boost energy, and protect your long-term health. These aren’t just stretches; they’re preventive medicine for the modern worker.
Let’s dive in.
Why Sitting Is Literally Killing Your Body
Before we get to the solutions, you need to understand what’s happening to your body when you sit for hours.
The devastating effects of prolonged sitting:
Your spine suffers:
- Sitting puts 40% more pressure on your spine than standing
- Discs compress and lose fluid, leading to degeneration
- Natural spinal curves flatten, causing chronic pain
- Core muscles weaken, reducing spine support
Your muscles atrophy:
- Hip flexors tighten and shorten (leading to lower back pain)
- Glutes “turn off” and weaken (called “dead butt syndrome” – yes, it’s real)
- Abs and back muscles disengage
- Shoulders round forward, straining neck and upper back
Your metabolism crashes:
- Calorie burning drops to 1 calorie per minute (versus 3+ when standing)
- Insulin response becomes sluggish, increasing diabetes risk
- HDL (good cholesterol) drops by 20% after just 2 hours of sitting
- Blood flow slows, increasing risk of blood clots
Your mental health declines:
- Brain fog increases due to reduced blood flow
- Energy levels plummet
- Risk of anxiety and depression increases by 25%
- Cognitive function decreases
A landmark 2025 study from the American Journal of Preventive Medicine found that people who sit more than 8 hours daily have a 20% higher mortality risk – even if they exercise regularly.
You can’t “out-exercise” a sedentary workday.
The solution? Movement breaks throughout the day. These seven exercises are designed to interrupt sitting, reactivate dormant muscles, and reverse the damage in real-time.
How to Use These Exercises
The protocol that actually works:
- Set a timer for every 45-60 minutes
- Choose 2-3 exercises from the list below
- Spend 3-5 minutes doing them
- Return to work refreshed
That’s 6-10 movement breaks in an 8-hour workday. It sounds like a lot, but these breaks actually increase productivity (more on that later).
Pro tip: Stack these exercises with existing habits. Every time you finish a meeting, answer an email, or complete a task – do one exercise. Make movement automatic.
Now, let’s get to the exercises.
Exercise 1: The Desk-Supported Hip Flexor Stretch
What it fixes: Tight hip flexors (the #1 cause of lower back pain in desk workers)
Why it matters:
When you sit, your hip flexors are in a shortened position for hours. They adapt by tightening and shortening permanently. This pulls your pelvis forward, flattening your lower back curve and causing chronic pain.
I ignored my tight hip flexors for years. Big mistake. Once I started addressing them, my back pain improved by 70% within three weeks.
How to do it:
- Stand facing your desk, about 2 feet away
- Place your right foot back into a lunge position (like you’re proposing)
- Keep your back leg straight, heel on the ground
- Place both hands on your desk for support
- Gently push your hips forward until you feel a stretch in the front of your right hip/thigh
- Keep your core engaged (don’t arch your lower back excessively)
- Hold for 30-45 seconds
- Switch legs and repeat
You’re doing it right if:
- You feel the stretch deep in the front of your hip and thigh
- Your lower back feels relieved, not strained
- You can breathe normally
Common mistakes to avoid:
- Arching your back too much (engage your abs)
- Holding your breath (breathe steadily)
- Rushing through it (this stretch needs time to work)
Do this: 2-3 times per day, especially after sitting for long periods
Real user feedback:
Marcus, a 34-year-old software developer: “I was skeptical about a simple stretch helping my chronic back pain. After doing this consistently for two weeks, I had less pain than I’d experienced in two years. Game changer.”
Exercise 2: Seated Spinal Twist
What it fixes: Spinal compression, mid-back tension, and digestive sluggishness
Why it matters:
Your spine has natural rotation built into it – but sitting locks it into one position. This causes the small muscles between vertebrae to stiffen, reducing mobility and causing pain. Twisting decompresses the spine, mobilizes vertebrae, and even stimulates digestion (which slows when you sit).
How to do it:
- Sit up straight in your chair, feet flat on the floor
- Place your right hand on the outside of your left knee
- Place your left hand on the armrest or back of your chair
- Inhale deeply, lengthening your spine
- Exhale and gently twist to the left, using your hands for leverage (not force)
- Look over your left shoulder
- Hold for 20-30 seconds, breathing steadily
- Inhale back to center
- Repeat on the right side
Key points:
- The twist should come from your mid-back, not your neck
- Keep both sit bones planted on the chair
- Don’t force the twist – gentle is more effective
- Your shoulders should stay relaxed
You’re doing it right if:
- You feel a gentle stretch along your spine
- You can breathe easily
- Your mid-back feels “released” afterward
Bonus benefits:
- Reduces afternoon bloating (the twist massages internal organs)
- Improves breathing capacity
- Releases tension in shoulder blades
Do this: Every 1-2 hours, or whenever you feel stiff
Advanced variation:
If you want a deeper stretch, stand up and do the same movement with your feet hip-width apart. This allows for greater range of motion.
Exercise 3: Wall Angels (or Door Frame Angels)
What it fixes: Rounded shoulders, forward head posture, and upper back weakness
Why it matters:
Look around your office right now. Notice how almost everyone’s shoulders are rounded forward? That’s “upper crossed syndrome” – tight chest muscles and weak upper back muscles creating a hunched posture.
This doesn’t just look bad; it causes:
- Chronic neck pain and headaches
- Shoulder impingement and pain
- Reduced lung capacity (up to 30%!)
- Decreased confidence (posture affects mood)
Wall angels retrain your muscles to hold proper posture.
How to do it:
- Stand with your back against a wall (or use a door frame)
- Press your lower back, upper back, and head against the wall
- Raise your arms to form a “W” position – elbows bent at 90 degrees, upper arms parallel to the floor
- Press the backs of your hands, elbows, and arms against the wall
- Slowly slide your arms up the wall, straightening them into a “Y” position
- Keep everything pressed against the wall as you move
- Slowly return to the “W” position
- Repeat 10-12 times
You’re doing it right if:
- You feel your shoulder blades squeezing together
- Your chest feels stretched
- It’s challenging to keep everything pressed to the wall (that shows how tight you are)
Common struggles:
Most people can’t keep their lower back AND arms against the wall simultaneously at first. That’s okay – it shows how much you need this exercise. Do your best; you’ll improve quickly.
Do this: 2-3 times daily, especially after long computer sessions
Jessica’s experience:
“I had chronic headaches that my doctor attributed to neck tension from my desk job. After doing wall angels daily for a month, my headaches reduced by about 80%. I also noticed I stopped getting that painful knot between my shoulder blades.”
Exercise 4: Desk Push-Ups
What it fixes: Weak chest and arms, poor circulation, low energy
Why it matters:
Sitting decreases blood flow and energy. A quick strength exercise like desk push-ups gets your heart pumping, activates large muscle groups, and provides an energy boost better than coffee.
Plus, it maintains upper body strength that deteriorates with prolonged sitting.
How to do it:
- Stand about 3 feet from your desk
- Place your hands on the edge of your desk, slightly wider than shoulder-width
- Walk your feet back until your body forms a straight line from head to heels
- Keep your core engaged (don’t let your hips sag)
- Bend your elbows, lowering your chest toward the desk
- Push back up to starting position
- Complete 10-15 repetitions
Modifications:
Too easy?
- Move your feet further back (more horizontal = harder)
- Slow down the movement (3 seconds down, 3 seconds up)
- Do them on a lower surface
Too hard?
- Move your feet closer to the desk (more vertical = easier)
- Reduce the range of motion
- Do fewer reps and build up
You’re doing it right if:
- Your body stays in a straight line (no sagging hips or piked butt)
- You feel it in your chest, shoulders, and arms
- You’re breathing steadily (exhale as you push up)
Energy boost science:
A 2026 study from the Journal of Occupational Health found that doing 10 desk push-ups increased alertness and focus for the next 45 minutes – more effectively than a caffeine break.
Do this: 2-3 times daily, especially during the afternoon slump (2-3 PM)
Exercise 5: Seated Figure-Four Glute Stretch
What it fixes: Tight glutes and piriformis (major causes of sciatica and lower back pain)
Why it matters:
When you sit, your glutes are compressed and inactive for hours. They tighten up, and in many cases, the piriformis muscle (deep in your glute) can compress the sciatic nerve, causing pain that radiates down your leg.
This stretch addresses both issues and can provide instant relief.
How to do it:
- Sit up straight in your chair
- Place your right ankle on your left knee (making a “4” shape with your legs)
- Keep your right foot flexed (toes pointing toward your shin, not drooping)
- Sit up tall, lengthening your spine
- Gently press down on your right knee with your right hand
- Lean forward from your hips (not your lower back) until you feel a stretch in your right glute
- Hold for 30-45 seconds
- Switch sides
You’re doing it right if:
- You feel a deep stretch in your glute/hip area
- Your lower back stays relatively straight (don’t round it)
- You can breathe comfortably
Red flags:
If you feel sharp pain or tingling down your leg, ease off. You might be pressing a nerve. Make the stretch gentler.
Why your IT band will thank you:
Tight glutes contribute to IT band syndrome (outer hip/thigh pain common in desk workers). This stretch helps prevent it.
Do this: 3-4 times daily, especially if you have lower back or hip discomfort
Real results:
David, 31: “I had sciatic pain shooting down my left leg for months. Physical therapy helped, but this stretch – done consistently throughout my workday – was what actually resolved it. Now I do it preventatively.”
Exercise 6: Wrist and Forearm Stretches
What it fixes: Carpal tunnel symptoms, wrist pain, and forearm tension
Why it matters:
If you type all day, your wrists are in a compromised position for hours, and your forearm muscles are in constant tension. Over time, this leads to:
- Carpal tunnel syndrome
- Tendonitis
- Chronic wrist pain
- Reduced grip strength
- Tingling and numbness in fingers
I developed early carpal tunnel symptoms at 27. These stretches – done consistently – eliminated my symptoms within six weeks without needing wrist braces or medication.
The two essential stretches:
Stretch 1: Wrist Extensors
- Extend your right arm straight in front of you, palm facing down
- Use your left hand to gently pull your right fingers down and toward you
- Keep your right arm straight
- You should feel a stretch on the top of your forearm
- Hold 20-30 seconds
- Switch arms
Stretch 2: Wrist Flexors
- Extend your right arm straight in front of you, palm facing up
- Use your left hand to gently pull your right fingers down and back
- Keep your right arm straight
- You should feel a stretch on the underside of your forearm
- Hold 20-30 seconds
- Switch arms
Bonus: The Prayer Stretch
- Place your palms together in front of your chest (prayer position)
- Keep your elbows out to the sides
- Lower your hands toward your waist while keeping palms pressed together
- Stop when you feel a good stretch in your wrists and forearms
- Hold 20-30 seconds
You’re doing it right if:
- The stretch feels intense but not painful
- You feel relief afterward
- Your wrists feel more mobile
Prevention is key:
Don’t wait until you have carpal tunnel symptoms. If you type regularly, do these stretches 3-4 times daily.
Do this: Every 2 hours of typing/mouse work
Ergonomic note:
These stretches are most effective when combined with proper keyboard and mouse positioning. Your wrists should be neutral (not bent up or down) while typing.
Exercise 7: Standing Desk Calf Raises
What it fixes: Poor circulation, ankle stiffness, and leg fatigue
Why it matters:
Sitting compresses blood vessels in your legs, reducing circulation. This leads to:
- Swollen ankles and feet
- Varicose veins (over time)
- Increased risk of blood clots (DVT)
- Fatigue and heavy-feeling legs
Calf raises activate your “second heart” – the calf muscle pump that pushes blood back up from your legs to your heart.
How to do it:
- Stand behind your chair (hold the back for balance)
- Place your feet hip-width apart
- Slowly rise up onto your toes, lifting your heels as high as possible
- Hold for 2 seconds at the top
- Slowly lower back down
- Repeat 15-20 times
Variations:
Single-leg calf raises (harder):
- Do the same movement on one leg at a time
- Builds more strength and balance
Seated calf raises (if you can’t stand):
- Sit in your chair, feet flat
- Lift your heels off the ground while keeping toes planted
- Less effective for circulation but better than nothing
You’re doing it right if:
- You feel your calf muscles working
- Your legs feel lighter and more energized afterward
- You can maintain balance (use the chair as needed)
Circulation boost:
This exercise is especially important if you’ve noticed your feet swelling by the end of the workday or if you have any varicose veins.
Do this: Every 1-2 hours, especially in the afternoon
Added benefit:
Strong calves reduce the risk of ankle injuries and improve overall mobility and balance.
The Science: Why These Exercises Actually Work
You might be thinking, “Can a few simple stretches really make a difference?”
The research says yes – emphatically.
Recent studies show:
2025 Stanford Study:
Office workers who took 5-minute movement breaks every hour reduced lower back pain by 54% over 6 weeks and reported 32% higher energy levels.
2024 Mayo Clinic Research:
Breaking up sitting with simple exercises increased metabolic rate by 28%, improved insulin sensitivity, and reduced inflammation markers.
2026 Journal of Occupational Medicine:
Workers who did workstation exercises reported 41% fewer sick days and 38% higher job satisfaction compared to sedentary workers.
The mechanism:
These exercises work by:
- Reactivating dormant muscles that “turn off” during sitting
- Increasing blood flow to muscles and the brain
- Decompressing joints and discs that bear excessive pressure when sitting
- Releasing endorphins that improve mood and reduce pain perception
- Breaking the sitting cycle before damage accumulates
Think of it like this: Sitting damage is cumulative, but so is movement benefit. Every exercise session is a deposit in your health bank account.
Creating Your Personalized Workstation Exercise Routine
Not every exercise will resonate with everyone. Here’s how to create a routine that works for YOU.
Step 1: Identify your problem areas
Check all that apply:
- ☐ Lower back pain → Prioritize Exercise 1 (Hip Flexor Stretch) and Exercise 5 (Glute Stretch)
- ☐ Neck and shoulder pain → Prioritize Exercise 3 (Wall Angels) and Exercise 2 (Spinal Twist)
- ☐ Wrist/hand issues → Prioritize Exercise 6 (Wrist Stretches)
- ☐ Poor circulation/swollen legs → Prioritize Exercise 7 (Calf Raises)
- ☐ Low energy → Prioritize Exercise 4 (Desk Push-ups)
- ☐ General stiffness → Do all exercises in rotation
Step 2: Create your schedule
The Hourly Method:
- Set a timer for every hour
- Do 2 different exercises
- Rotate through your priority list
- Takes 3-5 minutes per session
The Task-Based Method:
- After every meeting → Exercise 1
- After lunch → Exercises 3 and 4
- Mid-afternoon → Exercise 5 and 7
- Before leaving work → Exercise 2 and 6
The Minimal Method (for beginners):
- Morning break: 3 exercises
- Lunch: 3 exercises
- Afternoon break: 3 exercises
- Total: 9 movement sessions in one workday
Step 3: Track and adjust
Use a simple tracking method:
- Phone reminder app
- Desk calendar with checkboxes
- Habit tracking app (like Habitica or Streaks)
- Sticky notes on your monitor
After two weeks, assess:
- Which exercises helped most?
- Which times of day worked best?
- What barriers came up?
- How’s your pain/energy level changed?
Adjust your routine based on what works.
Overcoming Common Obstacles
“I’m too busy to take breaks”
I get it – deadlines are real. But consider this: these exercises actually increase productivity.
The 2025 study from the University of Illinois found that workers who took movement breaks completed tasks 23% faster with fewer errors than those who worked straight through.
Your brain needs breaks. You can either take intentional movement breaks or suffer through involuntary “brain fog breaks” where you stare at your screen unproductively.
Movement breaks are more efficient.
“I feel self-conscious doing exercises at work”
Valid concern. Here’s how to handle it:
- Do exercises that look like normal stretching (most people won’t even notice)
- Use a conference room or empty office for exercises like wall angels
- Do them during breaks when fewer people are around
- Consider that your health matters more than momentary awkwardness
- Be a trendsetter – coworkers often join in once they see the benefits
Sarah, a 29-year-old accountant, told me: “At first I felt weird doing desk push-ups. Now three of my coworkers do them with me. We call it our ‘sanity break.'”
“I forget to do them”
This is the #1 obstacle. Solutions:
- Set phone alarms with specific exercise names
- Use a smartwatch with hourly movement reminders
- Put sticky notes on your monitor
- Pair with existing habits (always stretch after checking email)
- Get an accountability partner at work
- Start with just one exercise and build from there
“My workspace isn’t suitable”
Adaptations for different setups:
- Cubicle: Most exercises work in a 6×6 space; use the wall angels against a filing cabinet
- Open office: Focus on seated exercises; do standing ones during restroom breaks
- Hot-desking: Do exercises that don’t require specific setups (all but wall angels)
- Work from home: You have the most freedom – use it!
There’s always a way to adapt.
Beyond Exercises: Optimizing Your Workspace
These exercises are most effective when combined with proper ergonomics.
Quick ergonomic checklist:
Monitor:
- ☐ Top of screen at or slightly below eye level
- ☐ Arm’s length distance away
- ☐ Directly in front of you (not to the side)
Chair:
- ☐ Feet flat on floor (or footrest)
- ☐ Knees at 90-degree angle
- ☐ Lower back supported by lumbar support
- ☐ Armrests support elbows at 90 degrees
Keyboard and mouse:
- ☐ Wrists in neutral position (not bent up or down)
- ☐ Shoulders relaxed (not hunched)
- ☐ Keyboard directly in front of you
- ☐ Mouse close to keyboard (not reaching)
The 20-20-20 rule for eyes:
Every 20 minutes, look at something 20 feet away for 20 seconds. This reduces eye strain and headaches.
Consider investing in:
- Standing desk converter (doesn’t have to be expensive)
- Ergonomic chair with proper lumbar support
- External keyboard and mouse (if using a laptop)
- Monitor riser
- Footrest
The ideal ratio:
Research suggests the optimal pattern is:
- 20 minutes sitting
- 8 minutes standing
- 2 minutes moving
Repeat this 30-minute cycle throughout your day.
Real Results: What to Expect
Week 1:
- Increased awareness of your body
- Some exercises might feel difficult (that shows you need them)
- Occasional muscle soreness (normal adaptation)
- Small energy improvements
Week 2-3:
- Exercises feel easier and more natural
- Noticeable reduction in end-of-day pain
- Better posture (you’ll catch yourself sitting up straighter)
- Improved focus and productivity
Week 4-6:
- Significant pain reduction (50-70% for most people)
- Exercises become habitual
- Better sleep quality
- Increased overall energy
- Coworkers asking what you’re doing differently
Week 8+:
- Pain might be completely gone or minimal
- Posture improvements visible in photos
- Stronger, more resilient body
- Prevention of long-term damage
Important note:
If pain worsens or doesn’t improve after 3-4 weeks of consistent exercises, see a healthcare provider. You might need additional assessment or treatment.
The Long-Term Impact
These aren’t just exercises – they’re an investment in your future health.
What you’re preventing:
- Chronic back problems requiring surgery
- Carpal tunnel syndrome requiring medical intervention
- Obesity and metabolic disease
- Cardiovascular issues from sedentary lifestyle
- Muscle atrophy and weakness
- Premature aging of joints and spine
- Mental health decline
What you’re building:
- Functional strength and mobility into your 50s, 60s, and beyond
- Sustainable work habits that protect your health
- Body awareness and self-care skills
- Resilience against the demands of modern work
Think about it: if you’re 30 now, you potentially have 35+ more years of working ahead of you. Taking 15-20 minutes daily to protect your body isn’t optional – it’s essential.
Your Action Plan: Starting Tomorrow
Don’t try to implement everything at once. Here’s your realistic starting plan:
This week:
- Choose 3 exercises that address your biggest problem areas
- Set 3 alarms during your workday
- Do those 3 exercises when alarms go off
- Track your completion (even just checkmarks)
Next week:
- Add 2 more exercises
- Increase frequency to 4-5 times daily
- Notice changes in pain, energy, and posture
Week 3-4:
- Incorporate all 7 exercises
- Experiment with timing to find what works best
- Adjust based on your schedule and needs
Beyond:
- Make it automatic (like brushing your teeth)
- Help a coworker start their own routine
- Continue protecting your health for decades to come
The Bottom Line
Your desk job doesn’t have to destroy your health.
Yes, sitting for hours is harmful. But with intentional movement breaks – specifically these 7 exercises – you can counteract the damage and actually thrive in a desk job.
These exercises take a total of 15-20 minutes spread throughout your 8-hour workday. That’s less than 5% of your work time, but the health impact is enormous.
You don’t need a gym. You don’t need equipment. You don’t need to change jobs.
You just need to move.
Your body is asking for help. Those aches, pains, and fatigue aren’t normal – they’re signals. These exercises are your answer.
Start tomorrow. Choose one exercise. Set one alarm. Do it.
Your future self – pain-free, energized, and healthy at 50, 60, 70 – will thank you.
What exercise will you start with? Leave a comment below and commit publicly – it increases your success rate by 65%!
Disclaimer: These exercises are for general wellness and prevention. If you have existing injuries, chronic pain conditions, or medical concerns, consult with a healthcare provider or physical therapist before starting any new exercise program.